

By Dr. Zach Greenwade, DC, MS | Published: Novmeber 9th, 2026
The deadlift is one of the most effective exercises for building full-body strength, but proper form is essential for maximum performance and safety. Modern exercise science shows that your spine adapts and strengthens with smart loading, so mastering key movement mechanics is your best path to long-term progress.
Watch the Full Video Guide
For step-by-step visual demonstrations, form breakdowns, and real-time exercise cues, watch the video guide here:
Watch: Master the Deadlift in 5 Steps — Performance Sport & Spine
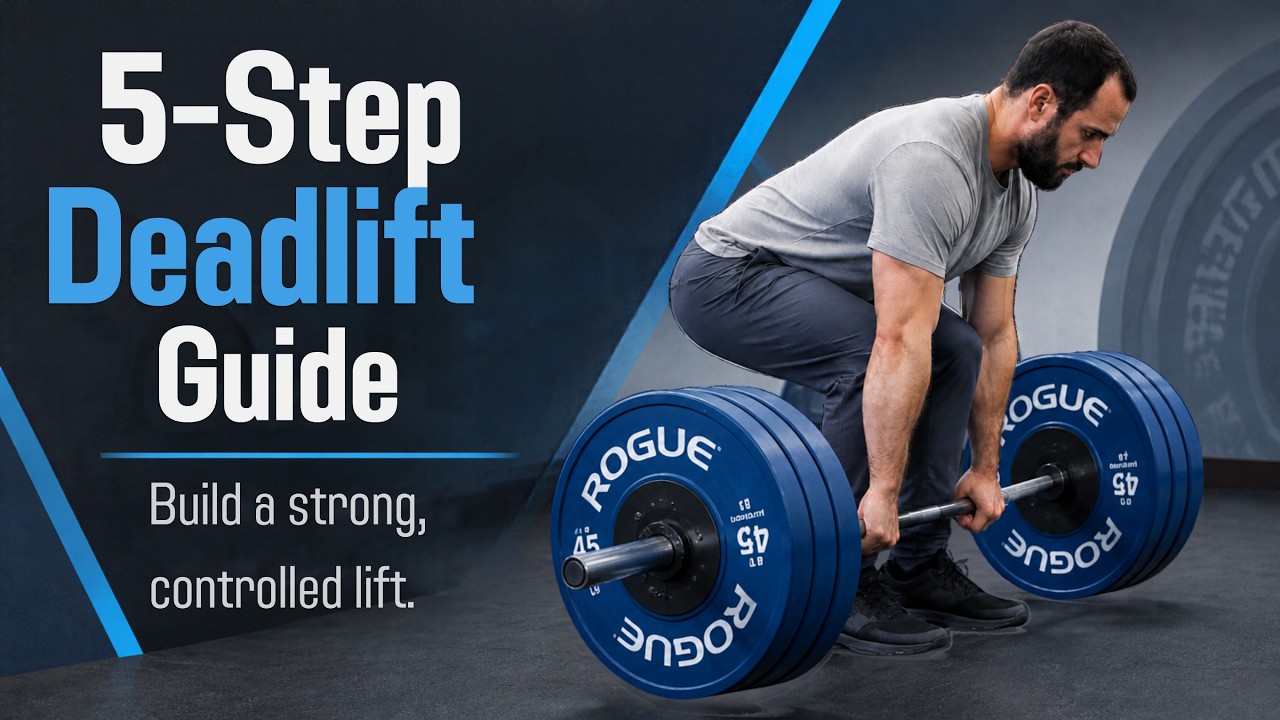
5 Steps to Master Your Deadlift Form
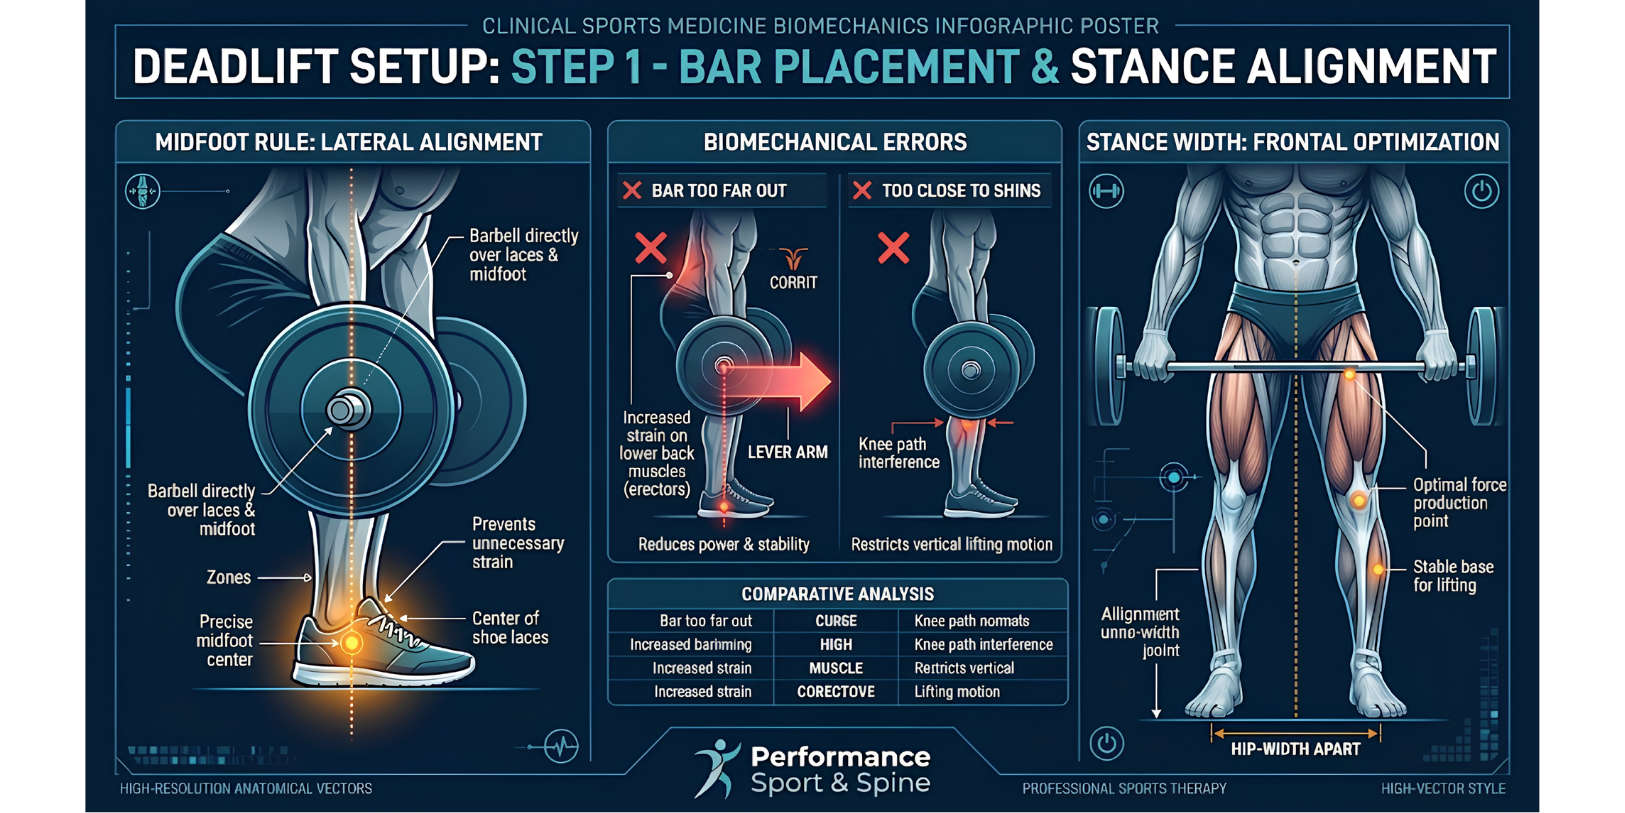
Step 1: Mastering Bar Placement and the Initial Setup
Everything starts at the floor. Before you even hinge your hips, ensure the barbell is in the proper starting position relative to your body.
Bar Placement: The Midfoot Rule The bar must be directly above the middle of your foot. A perfect visual cue is to think of it placed in the middle of your laces.
-
The Problem with “Too Far Out”: Positioning the bar over your toes increases the lever arm from the bar to your center of gravity, which dramatically increases stress on your lower back.
-
The Problem with “Too Close to Shins”: If the bar is too close, it will scrape your knees as you begin the pull, interfering with a vertical lift.
Foot Placement Your feet should be placed directly under your hips, or a position that mimics where you feel strongest and most balanced when jumping upward. This powerful, stable base sets the stage for everything else.
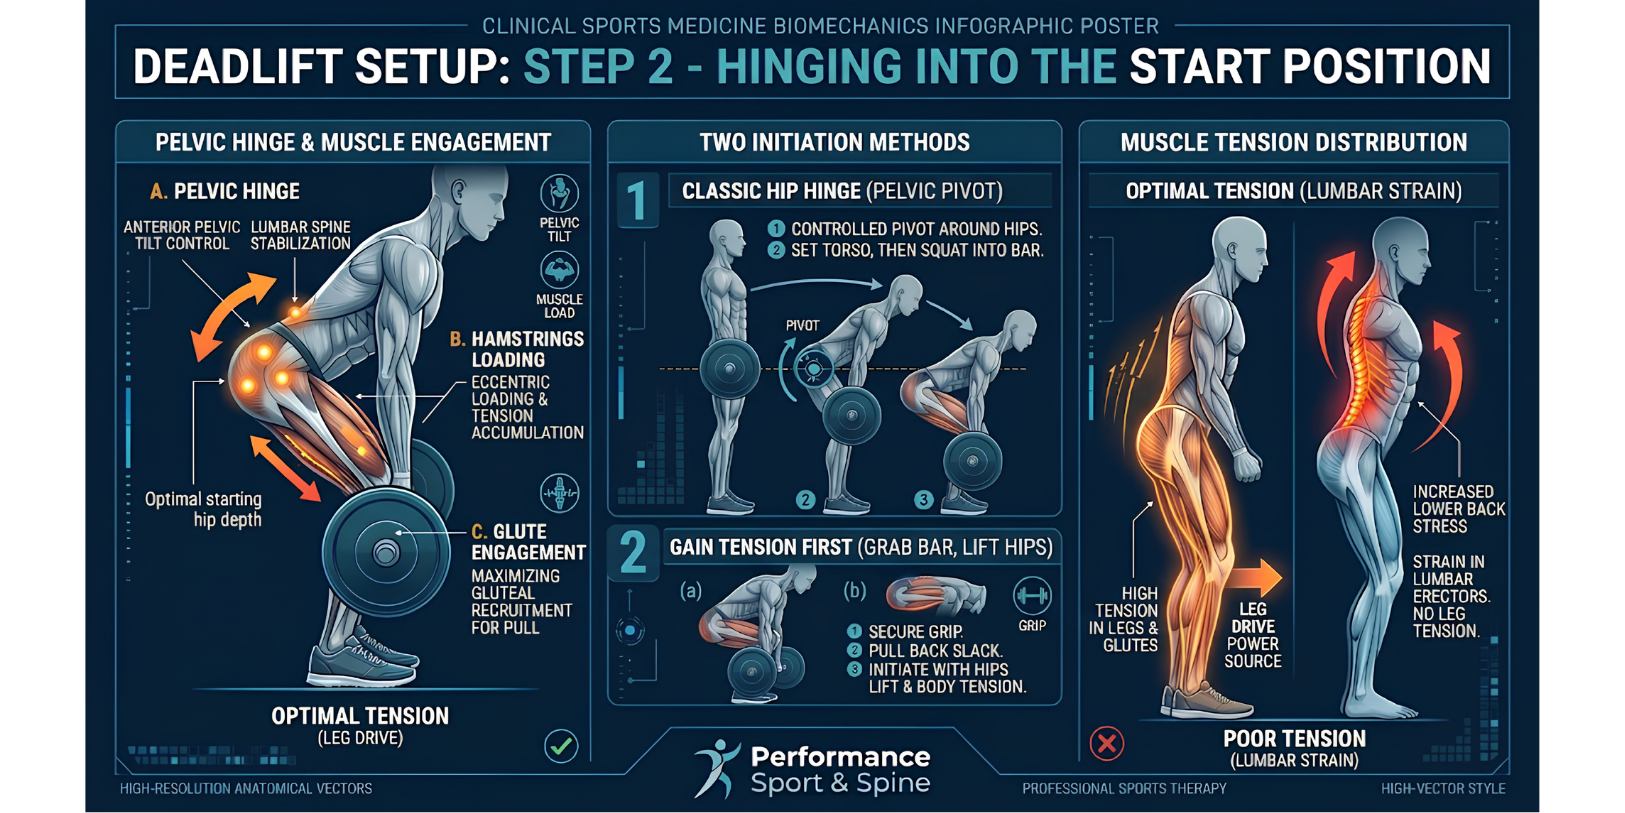
 Step 2: Hinging into the Start Position
This is where you load the prime movers—your hamstrings and glutes—while taking your back out of the leading role. The essential goal here is tension, not comfort. You should feel that tension strictly in your legs and hamstrings, not your lower back.
There are two primary ways to initiate this position:
-
The Classic Hip Hinge: Pivot strictly at the top of your pelvis.
-
Gain Tension First: Grab the bar and then lift your hips to find that leg tension.
 Essential Cue #1: The Banded Hip Hinge Pivot
If you struggle to differentiate pivoting at your back versus hinging at your hips, this banded drill will change your approach.
-
Setup: Loop a medium-weight physical therapy (PT) band around a sturdy pole. Step inside the loop.
-
Placement: Position the band high on your waist, right at your pelvis/where your belt would be.
-
The Movement: Maintain “soft knees” (slight bend) and push your hips straight backward, loading your glutes directly into the resistance of the band.
This band gives you a specific point of reference for where your pivot needs to be. Practice this soft knees/hips back/glutes-into-band movement several times to build this neurological pattern before touching the barbell.
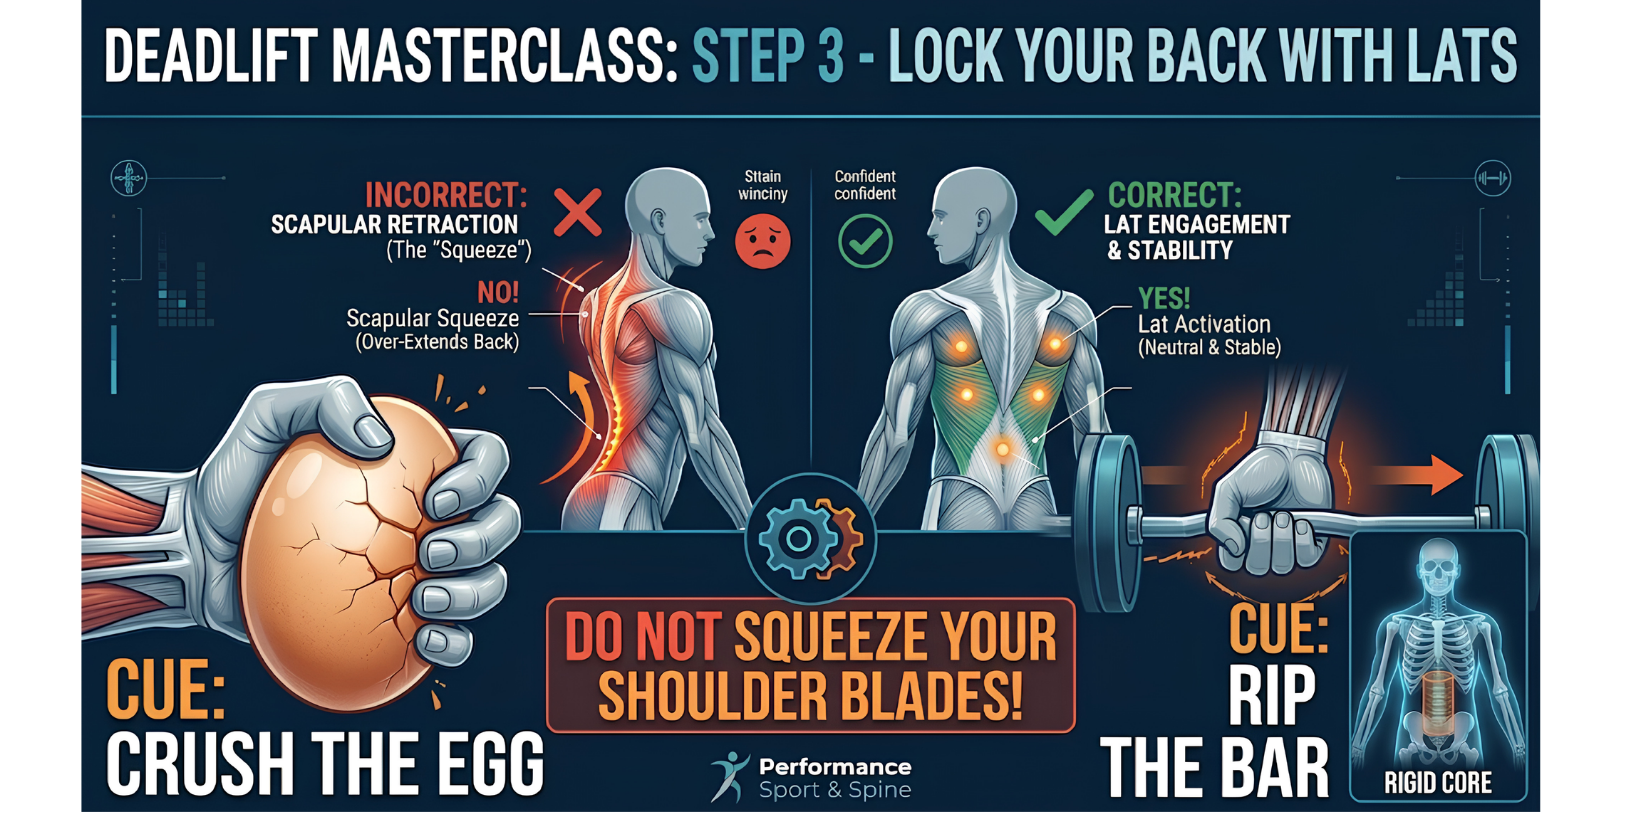 Step 3: Creating Full Body Bracing and Lat Activation
Before the actual lift, your entire body must become a rigid, tense unit. Deadlifting effectively requires your massive lats to create stability across your upper back, but many people make the mistake of aggressively squeezing their shoulder blades together, which can over-extend and weaken the back’s position.
Essential Cue #2: Crushing Eggs in Your Armpits (The Lat Pulldown Band Drill)
Instead of the shoulder blade squeeze, use these lat-activating cues.
-
Cue A: Eggs in Armpits: Imagine placing an egg deep into each armpit. Push down forcefully with your upper arm to think about “crushing” those eggs. This action locks your powerful lats into place.
-
Cue B: Ripping the Bar Apart: Think about grabbing the bar and trying to tear it apart horizontally.
Drill: Banded Lat Feel
-
Anchor a PT band at shoulder height (higher than in Step 2).
-
Grab the band with straight arms and pull down toward your hips.
-
Feel those large muscles activating along the sides of your torso—those are your lats. Make sure you feel these muscles activate during your bracing setup.
Step 4: executing the Lift: Horizontal, Not Vertical
The deadlift is a unique challenge: you must create intense full-body tension BEFORE the weight leaves the ground. With proper bracing (Steps 2 and 3), you should already feel like the weight is 50% lighter before the actual lift begins.
The Crucial Movement Pattern: Hips Forward, Shoulders Back.
Unlike a squat, which is a vertical-focused “up-and-down” exercise, the deadlift is fundamentally a horizontal movement. The barbell moves straight up (vertically), but your body achieves this by driving horizontally, pivoting around that hip pivot you practiced.
Your hips and shoulders must move at the same time. Your hips should not “shoot up” before your shoulders rise, nor vice versa.
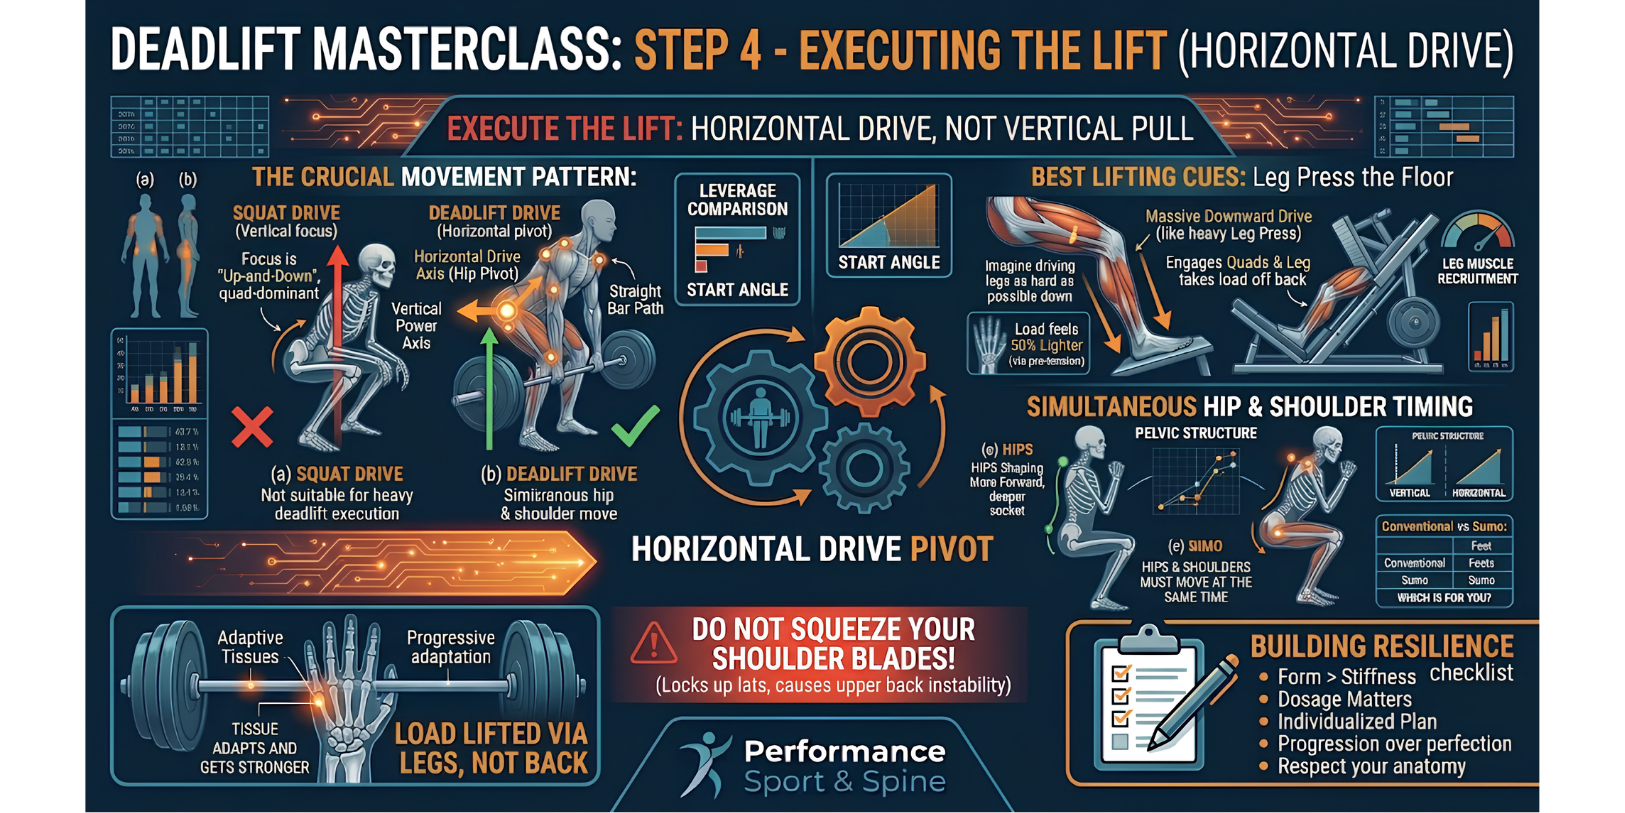 Best Lifting Cues: “Leg Press the Floor Away”
A classic for a reason. This cue is the key to involving your quad and leg drive more than your back. Once you are locked into that starting position and tense, don’t think “pull up.” Instead, think about driving your legs as hard as possible down into the ground, exactly as if you were doing a heavy leg press.
Step 5: Returning to Start and the Vertical Bar Path
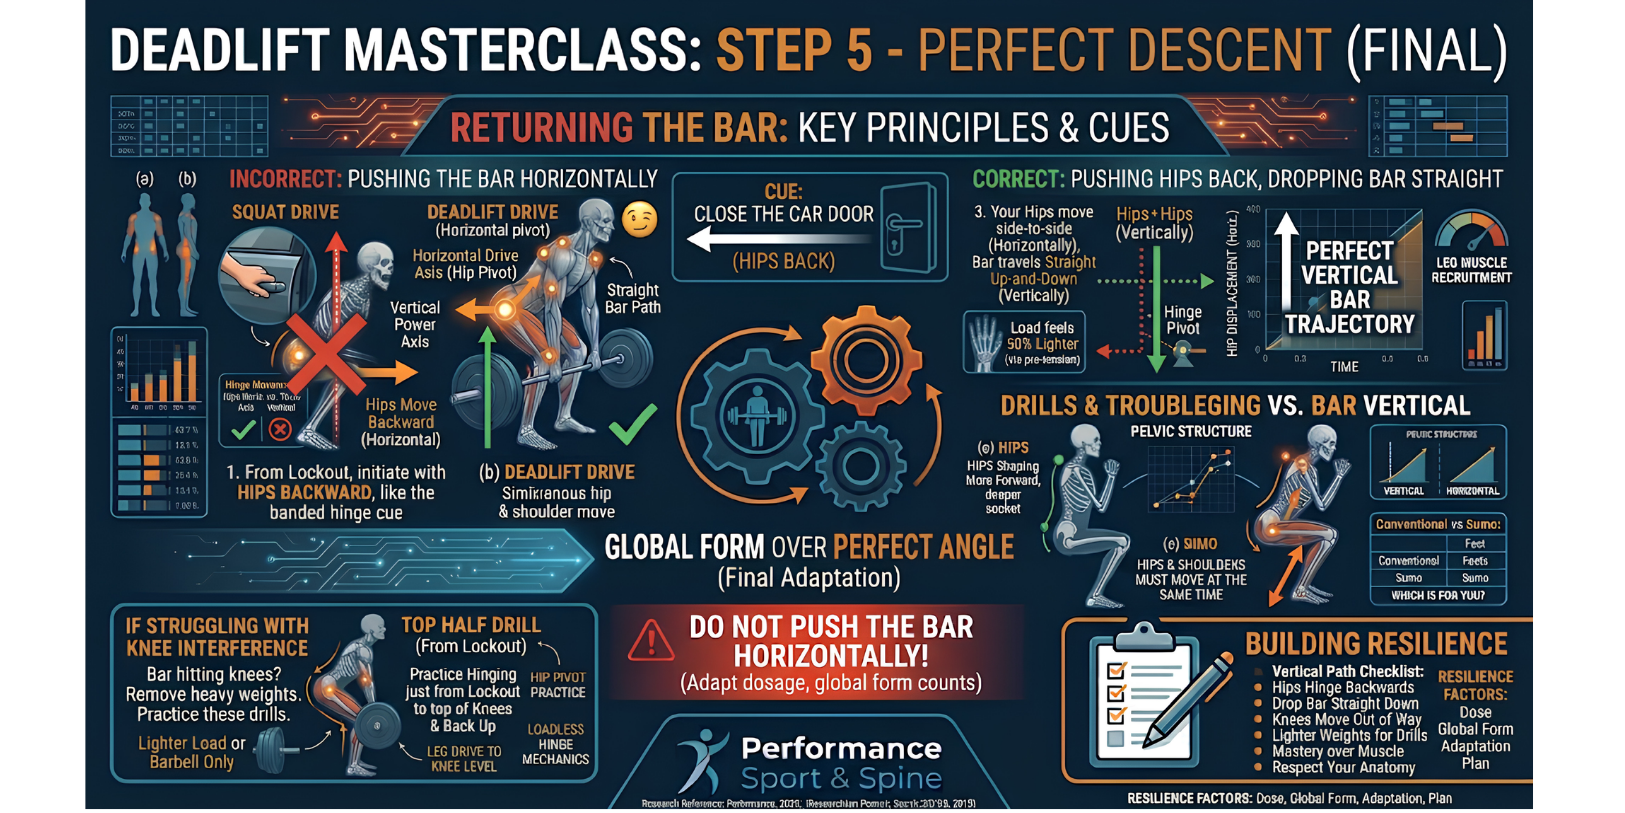
The barbell should maintain a perfectly vertical path from start to finish. This requires your body to actively move around the bar, rather than pushing the bar horizontally to avoid hitting your body.
To return the bar to the ground:
-
From the top, lock out and initiate the descent by closing the car door/pushing your hips backward, just like that banded hinge cue.
-
Drop the bar straight down vertically. Your hips move from side-to-side (horizontally) while the bar travels straight up-and-down.
For Drills & Troubleshooting: If you struggle with the bar hitting your knees, remove the heavy weights and practice these two specific drills using just the barbell or a lighter load:
-
Top Half Drill: Practice hinging just from the top lockout position down to the top of your knees and back up.
-
Bottom Half Drill: Practice moving the bar only from the ground up to your knees and back down.
The Myth of the Perfectly Rigid Back
A final common misconception is that you must “protect your back” by keeping it at a perfectly rigid angle throughout the entire movement. While “global form” (your overall body position) matters, advanced imaging studies show that even when a spine looks perfectly straight, the intervertebral disks bend slightly during heavy loading.
The key to back safety is not achieving some anatomical ideal, but rather developing strong form and using proper dosage (manageable weights). As you progressively challenge your deadlift, your spinal tissues will also adapt and get stronger, just like any other muscle.
Why Human Bodies are Different and How That Affects Form
Do not force yourself into a starting position that doesn’t feel right simply because it “looks perfect” on someone else. Human bodies are diverse, and three key anatomical variations will dictate how your best starting position looks and feels.
-
Arm Length vs. Height: People with longer arms are mechanically advantaged; their hands reach closer to the bar at the start.
-
Torso Length vs. Height: Someone with a long torso and short legs (like our narrator) will naturally sit lower. A person the same height with longer legs will have higher starting hips to achieve proper tension.
-
Hip Socket Anatomy: The depth, width, and orientation (forward vs. to the side) of your hip sockets will affect your preferred deadlift stance (narrower vs. wider foot placement, how much you toe out). Some individuals may find their hip anatomy means they are naturally stronger or more comfortable in a Sumo deadlift stance (wide legs, hands on the inside).
The Bottom Line on Anatomy: Be reassured: if your stance looks slightly different, but the movement feels tense and powerful (low energy state setup) and you have no pain, you are not doing it “wrong.” Respect your unique anatomy.
Mastering the deadlift is a process. Master these 5 steps and 2 cues, respect your anatomy, and you’ll build foundational strength that will serve you for a lifetime. If you found this guide helpful, don’t forget to like the video and subscribe for more guides from Performance Sport & Spine, and share this with anyone looking to build a better pull.
About the Author
Dr. Greenwade, DC, MS is an evidence-based sports chiropractor, movement specialist, and the founder of Performance Sport & Spine, serving patients across the Eastside in Redmond and Seattle. Holding a Master of Science in sports medicine alongside a Doctorate of Chiropractic, Dr. Greenwade specializes in modern physical medicine, progressive loading, and active, movement-based recovery. The clinic’s mission is to help active individuals and office professionals resolve acute and chronic musculoskeletal conditions without unnecessary injections, medications, or surgeries.
Medical Disclaimer: The information provided in this article, including text, graphics, images, and other material, is for educational and informational purposes only. It is not intended to be a substitute for professional medical advice, diagnosis, or treatment. Always seek the advice of a qualified healthcare provider with any questions you may have regarding a medical condition or treatment plan.


