

By Dr. Zach Greenwade, DC, MS | Published: Novmeber 16th, 2026
If you are dealing with gluteal tendinopathy and want to get back to running, rushing the process is the fastest way to trigger a flare-up. Tendons adapt slowly, and arbitrary timelines rarely work. Instead of guessing when your hip is ready, follow this five-step clinical framework to rebuild load tolerance safely and keep lateral hip pain from coming back.
Watch the Full Video Breakdown: Return to Running with Gluteal Tendinopathy (Step-by-Step Progression)

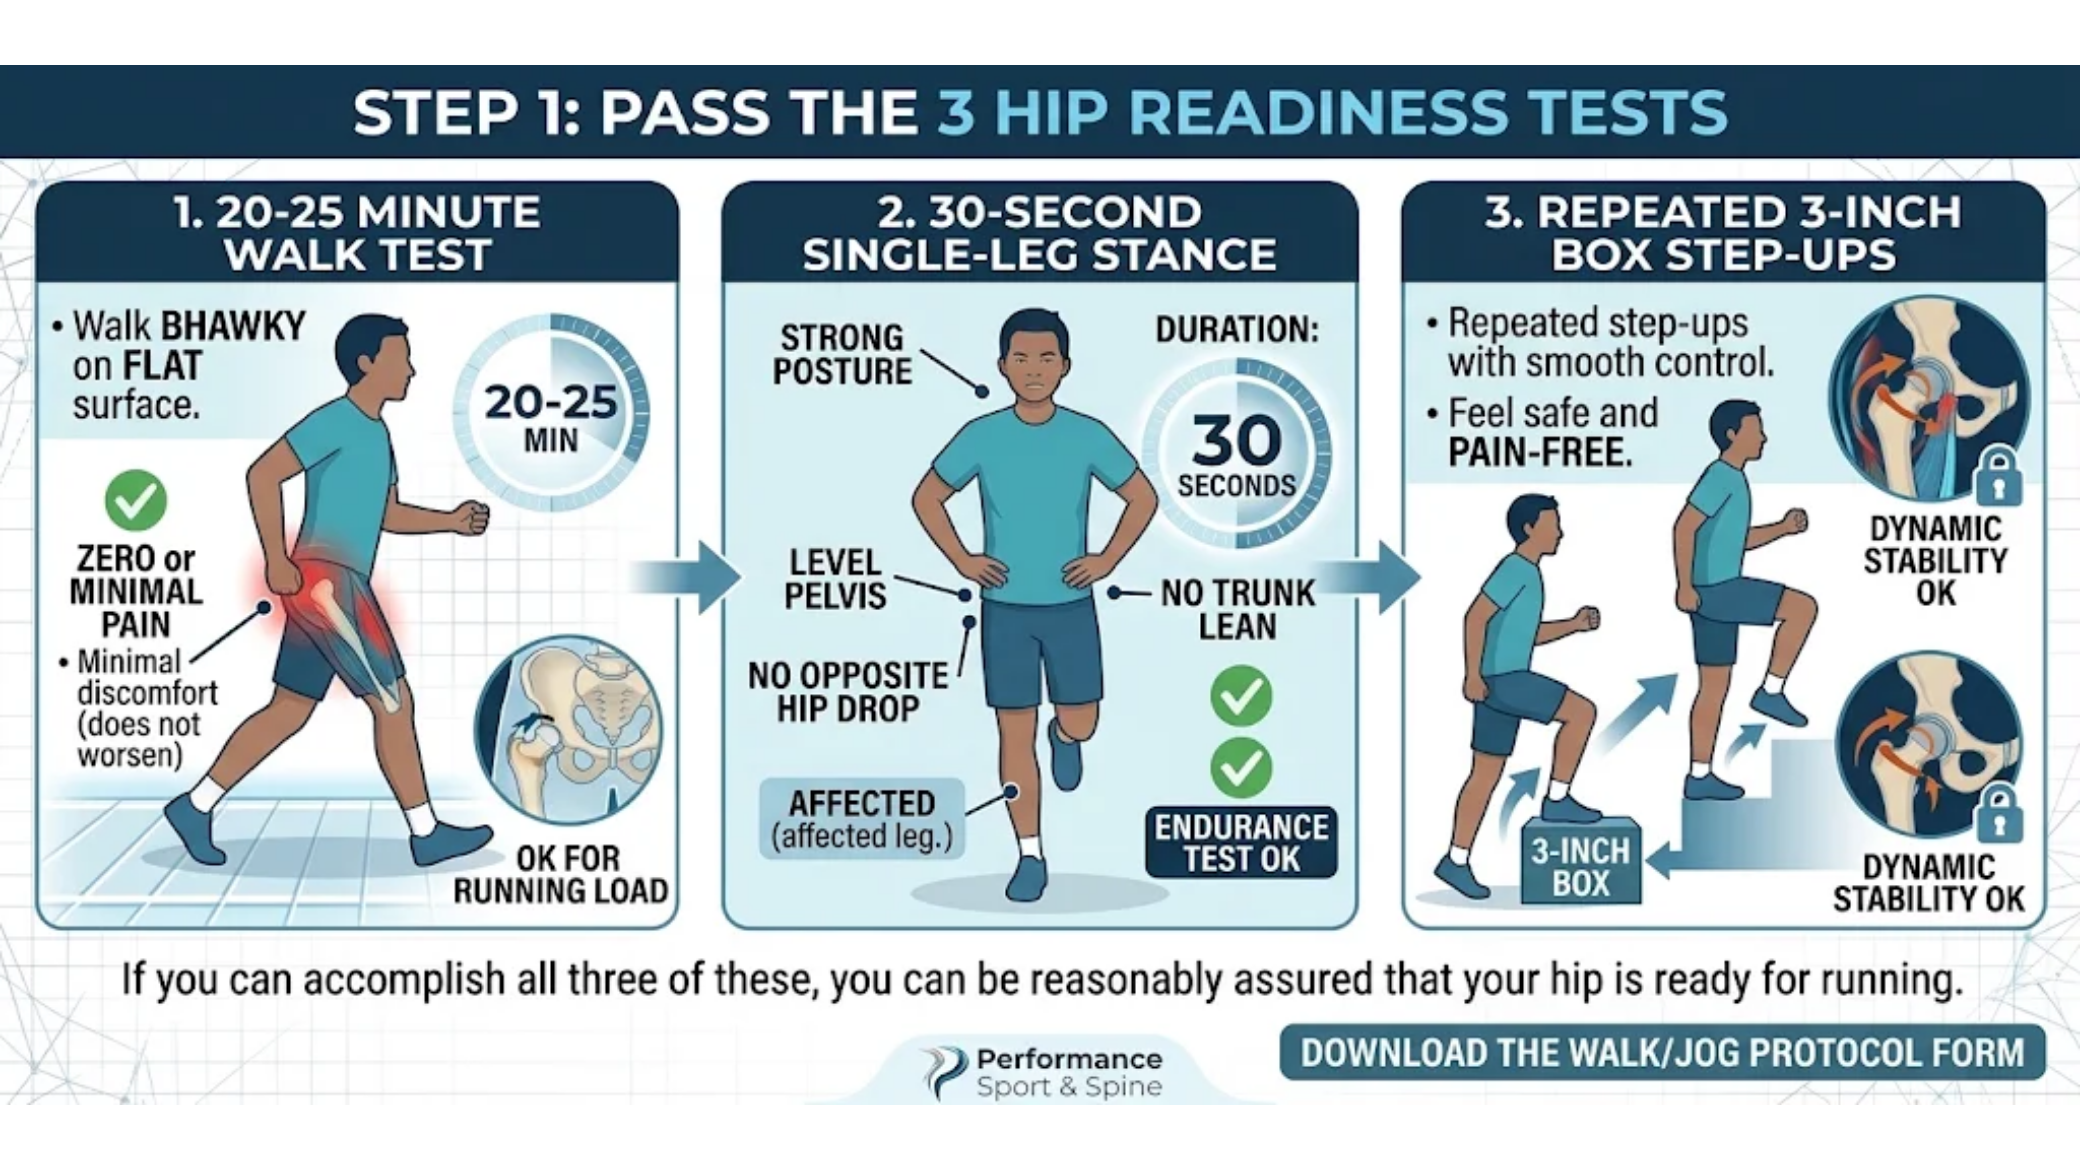
Step 1: Pass the 3 Hip Readiness Tests
Before taking a single running stride, you need objective proof that your hip abductors and gluteal tendons can handle basic single-leg load without irritation. You should be able to complete all three of these benchmarks comfortably before starting a return-to-run program:
-
20–25 Minute Walk Test: Walk briskly on a flat surface for 20 to 25 minutes with zero pain—or very minimal discomfort that does not worsen as you go.
-
30-Second Single-Leg Stance: Stand on the affected leg for 30 seconds with strong posture, keeping your pelvis level without your opposite hip dropping or your trunk leaning.
-
Repeated 3-Inch Box Step-Ups: Perform consecutive step-ups onto a 3-inch box with smooth control, feeling completely stable and pain-free.
 (Note: While these three benchmarks work for the vast majority of runners, individual biomechanics and injury severity may occasionally require slight modifications. If walking itself is currently painful, check out our guide on 5 Walking Modifications for Gluteal Tendinopathy.)
Step 2: Prime the Tendon with a Dynamic Warm-Up (and Concurrent Strength)
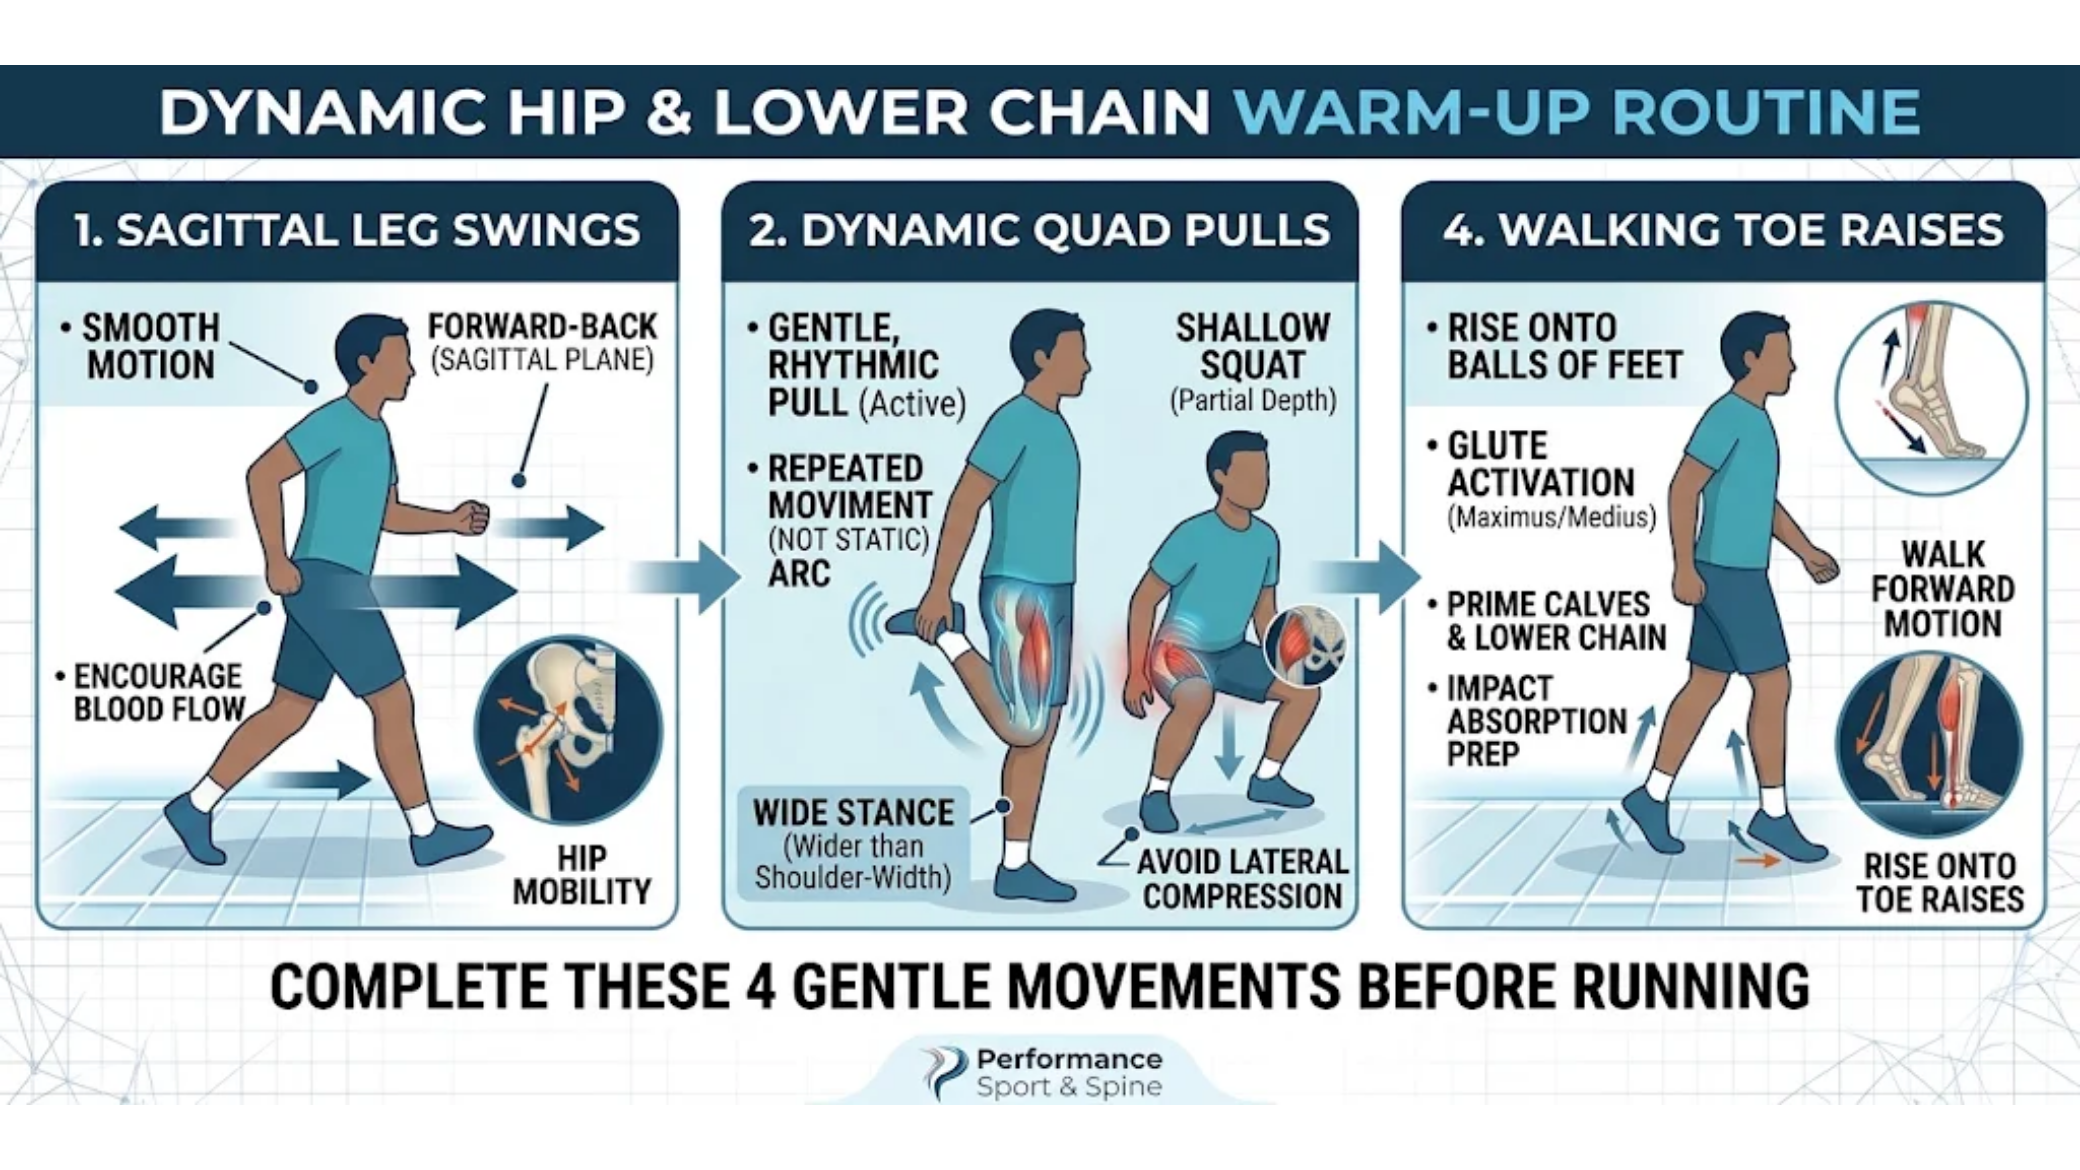
Cold, stiff tendons do not tolerate sudden tensile or compressive forces well—and aggressive static stretches (like figure-four or cross-body pulls) will only compress the tendon against the bone. Instead, spend a few minutes before every run preparing the hip tissues with four safe, targeted dynamic movements (detailed further in our 4 Gentle Hip Mobility Exercises for Gluteal Tendinopathy):
-
Sagittal Leg Swings: Swing your leg smoothly forward and backward to encourage blood flow and hip mobility without crossing midline.
-
Dynamic Quad Pulls: Gently pull your heel toward your glute in a rhythmic, moving pattern rather than holding an aggressive static stretch.
-
Wide-Stance Partial Mini-Squats: Set your feet slightly wider than shoulder-width apart and perform shallow squats to activate the glutes without compressing the lateral hip.
-
Walking Toe Raises: Walk forward rising up onto the balls of your feet to prime the calves and lower kinetic chain for impact absorption.
 Important Strength Note: Running alone will not remodel a tendinopathic tendon. You should already be progressing through a structured, progressive loading program—such as Level 3 of our Best Exercises for Gluteal Tendinopathy (Easy to Advanced Progression)—alongside your return-to-running schedule. Also, avoid relying on repetitive side-lying clamshells; learn Why Clamshell Exercises May Be Making Your Hip Pain Worse and what to do instead.
Step 3: Optimize Your Gait Mechanics & Running Environment
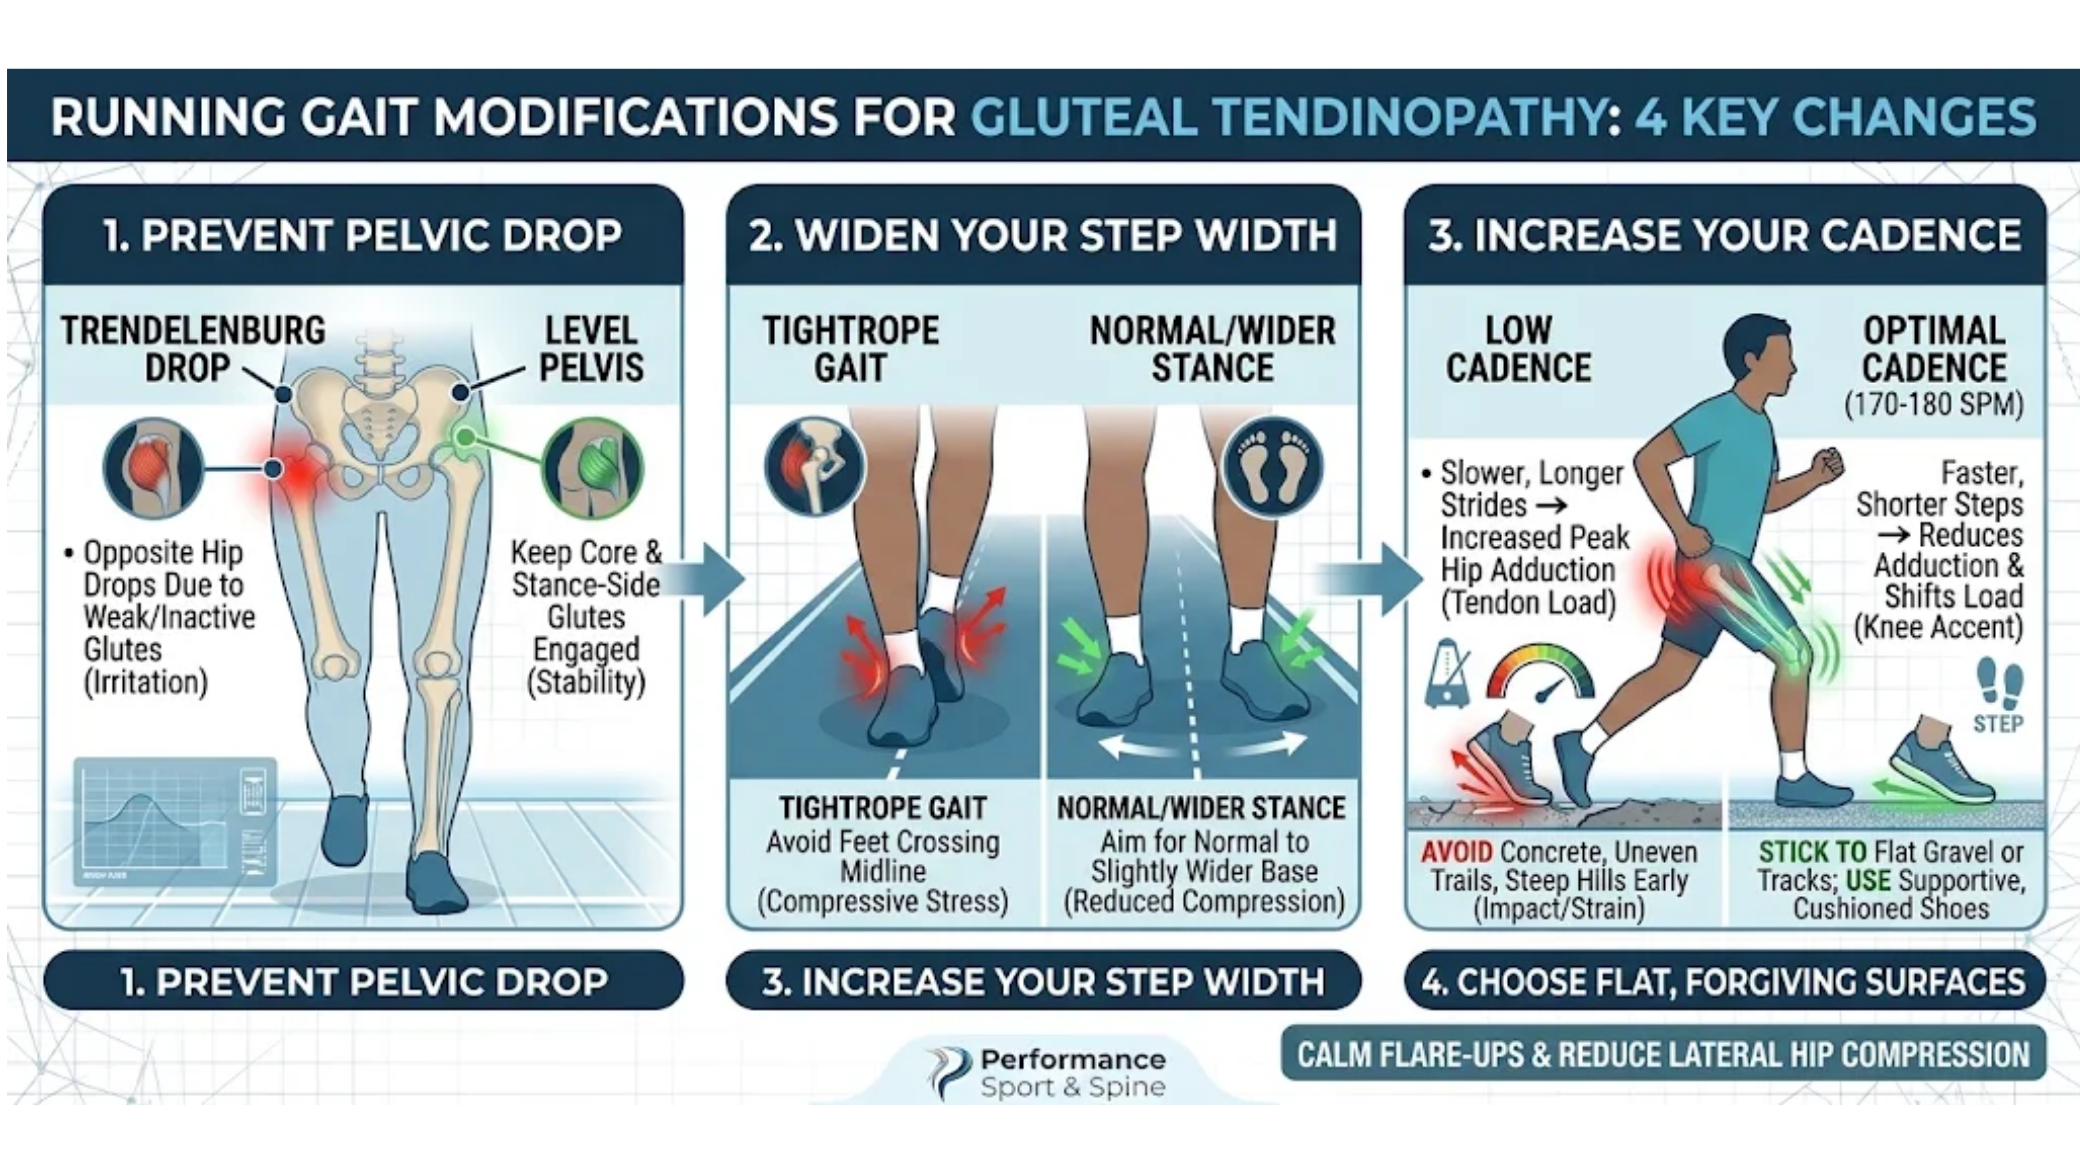
Even subtle mechanical flaws can multiply compressive stress on the gluteal tendons over thousands of footstrikes. Focus on these key gait and terrain adjustments (many of which also apply to your daily walking habits—see our Walking Modifications Guide):
-
Prevent Pelvic Drop: Keep your core and stance-side glutes engaged so your opposite hip does not drop down during mid-stance.
-
Widen Your Step Width: Avoid letting your feet cross over your body’s midline (a “tightrope” gait). Aim for a normal or slightly wider stance width to dramatically reduce lateral tendon compression.
-
Increase Your Cadence: Aim for a stride rate of 170 to 180 steps per minute. Research shows that slightly increasing step rate reduces peak hip adduction and shifts mechanical load away from the hip and toward the knee.
-
Choose Flat, Forgiving Surfaces: Stick to flat gravel paths or tracks rather than concrete, asphalt, or uneven trails. Avoid steep hills early on—both uphills and downhills increase strain on the lateral hip. Pair this with supportive, well-cushioned running shoes.
 Step 4: Monitor Symptoms Using the Stoplight Rule & 24-Hour Response
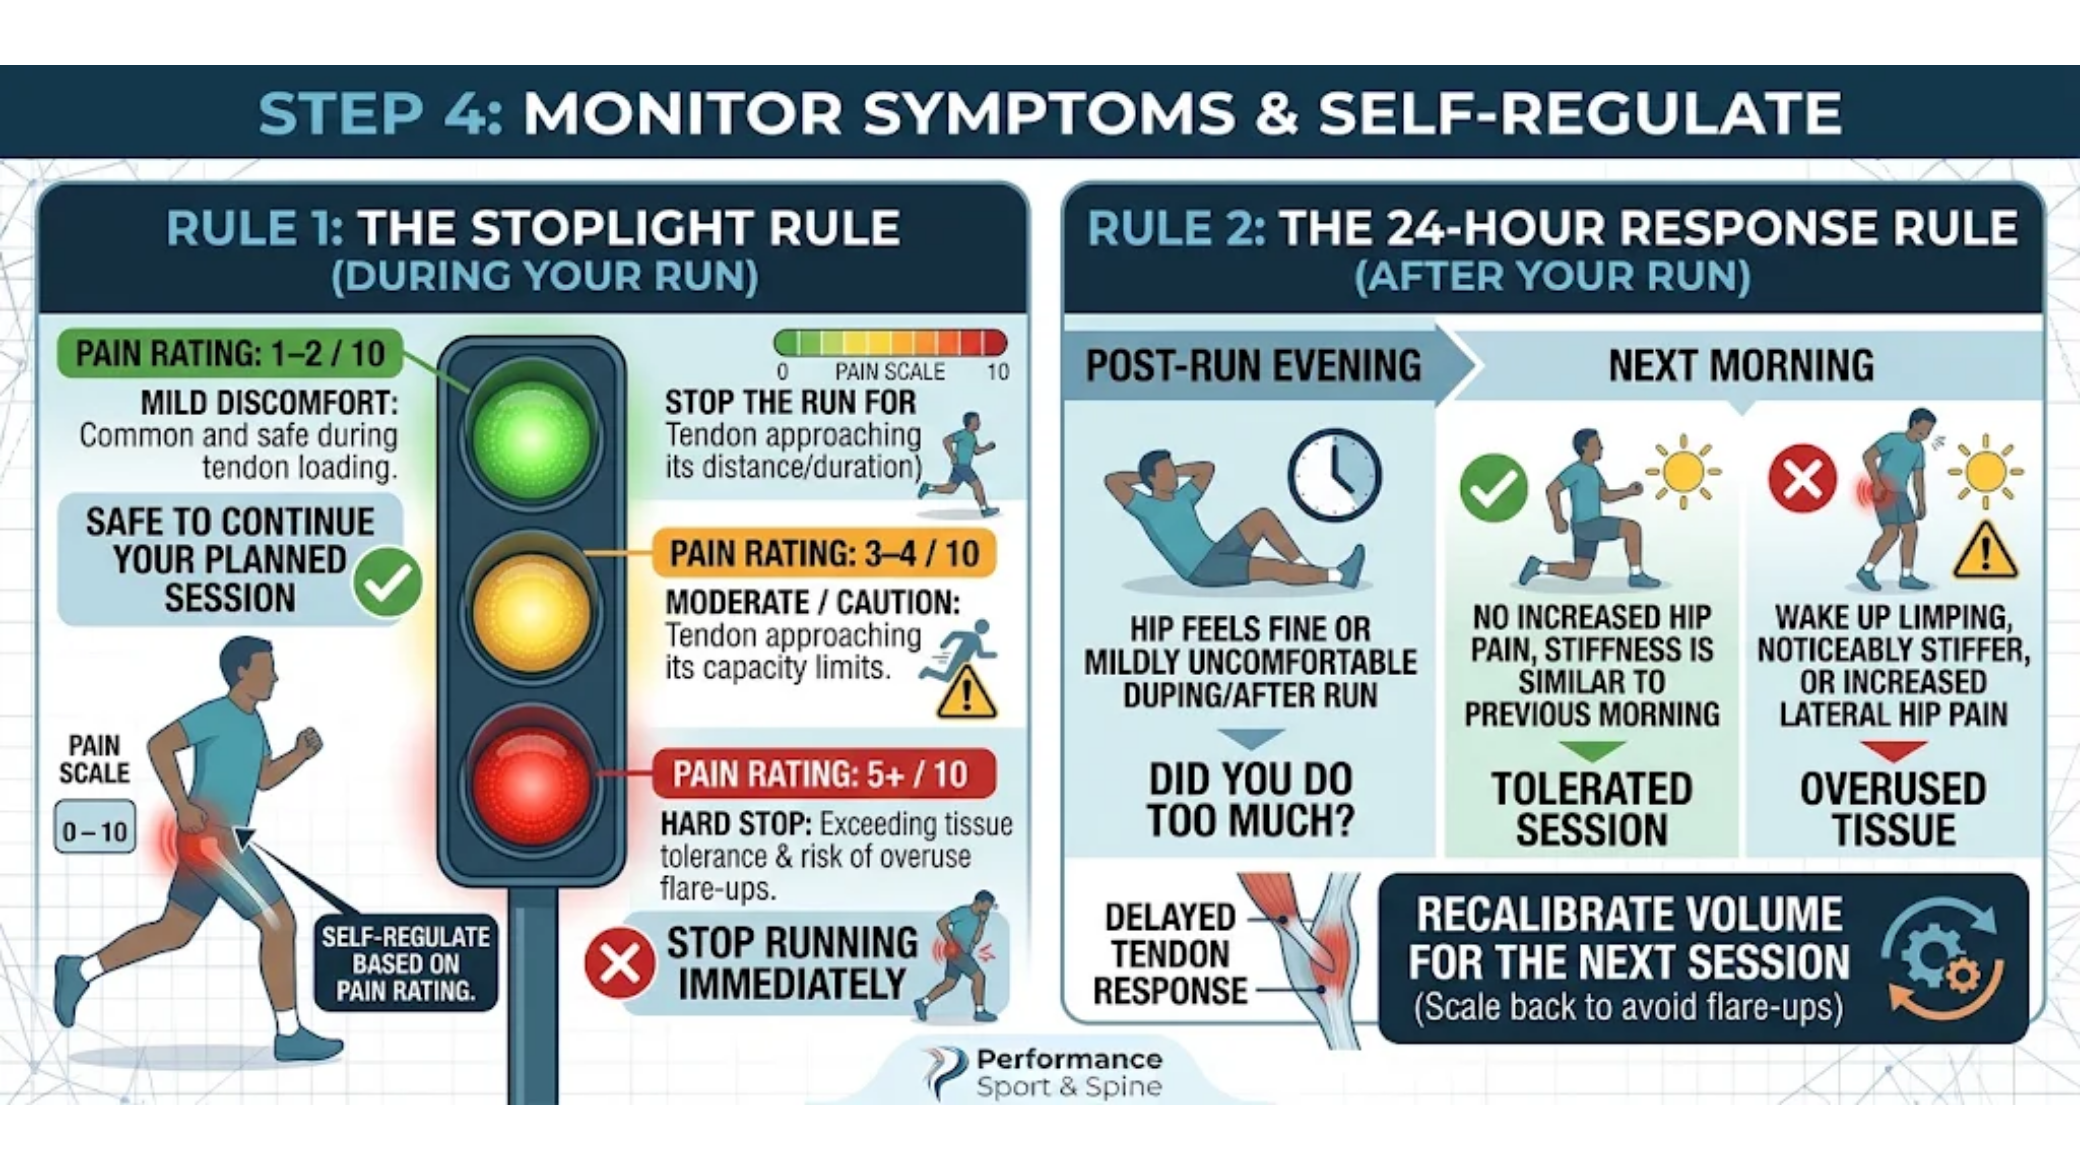
When rehabbing a tendon, mild discomfort is normal, but sharp or lingering pain means you are exceeding the tissue’s current capacity. Use these two rules to self-regulate every session:
The Stoplight Rule (During Your Run)
Rate your hip pain on a 0–10 scale (0 = no pain, 10 = worst pain imaginable):
-
Green Light (1–2/10 — Mild Discomfort): Safe to continue your planned session.
-
Yellow Light (3–4/10 — Moderate / Caution): If you are testing a new distance or duration and hit a 3 or 4, stop the run for the day.
-
Red Light (5+/10 — Hard Stop): Stop running immediately.
The 24-Hour Response Rule (After Your Run)
Tendons often have a delayed reaction to load. Even if your hip feels fine during a run, pay close attention to how it feels that evening and the next morning. If you wake up limping, noticeably stiffer, or with increased lateral hip pain compared to the previous morning, you did too much. Scale back your volume for the next session.
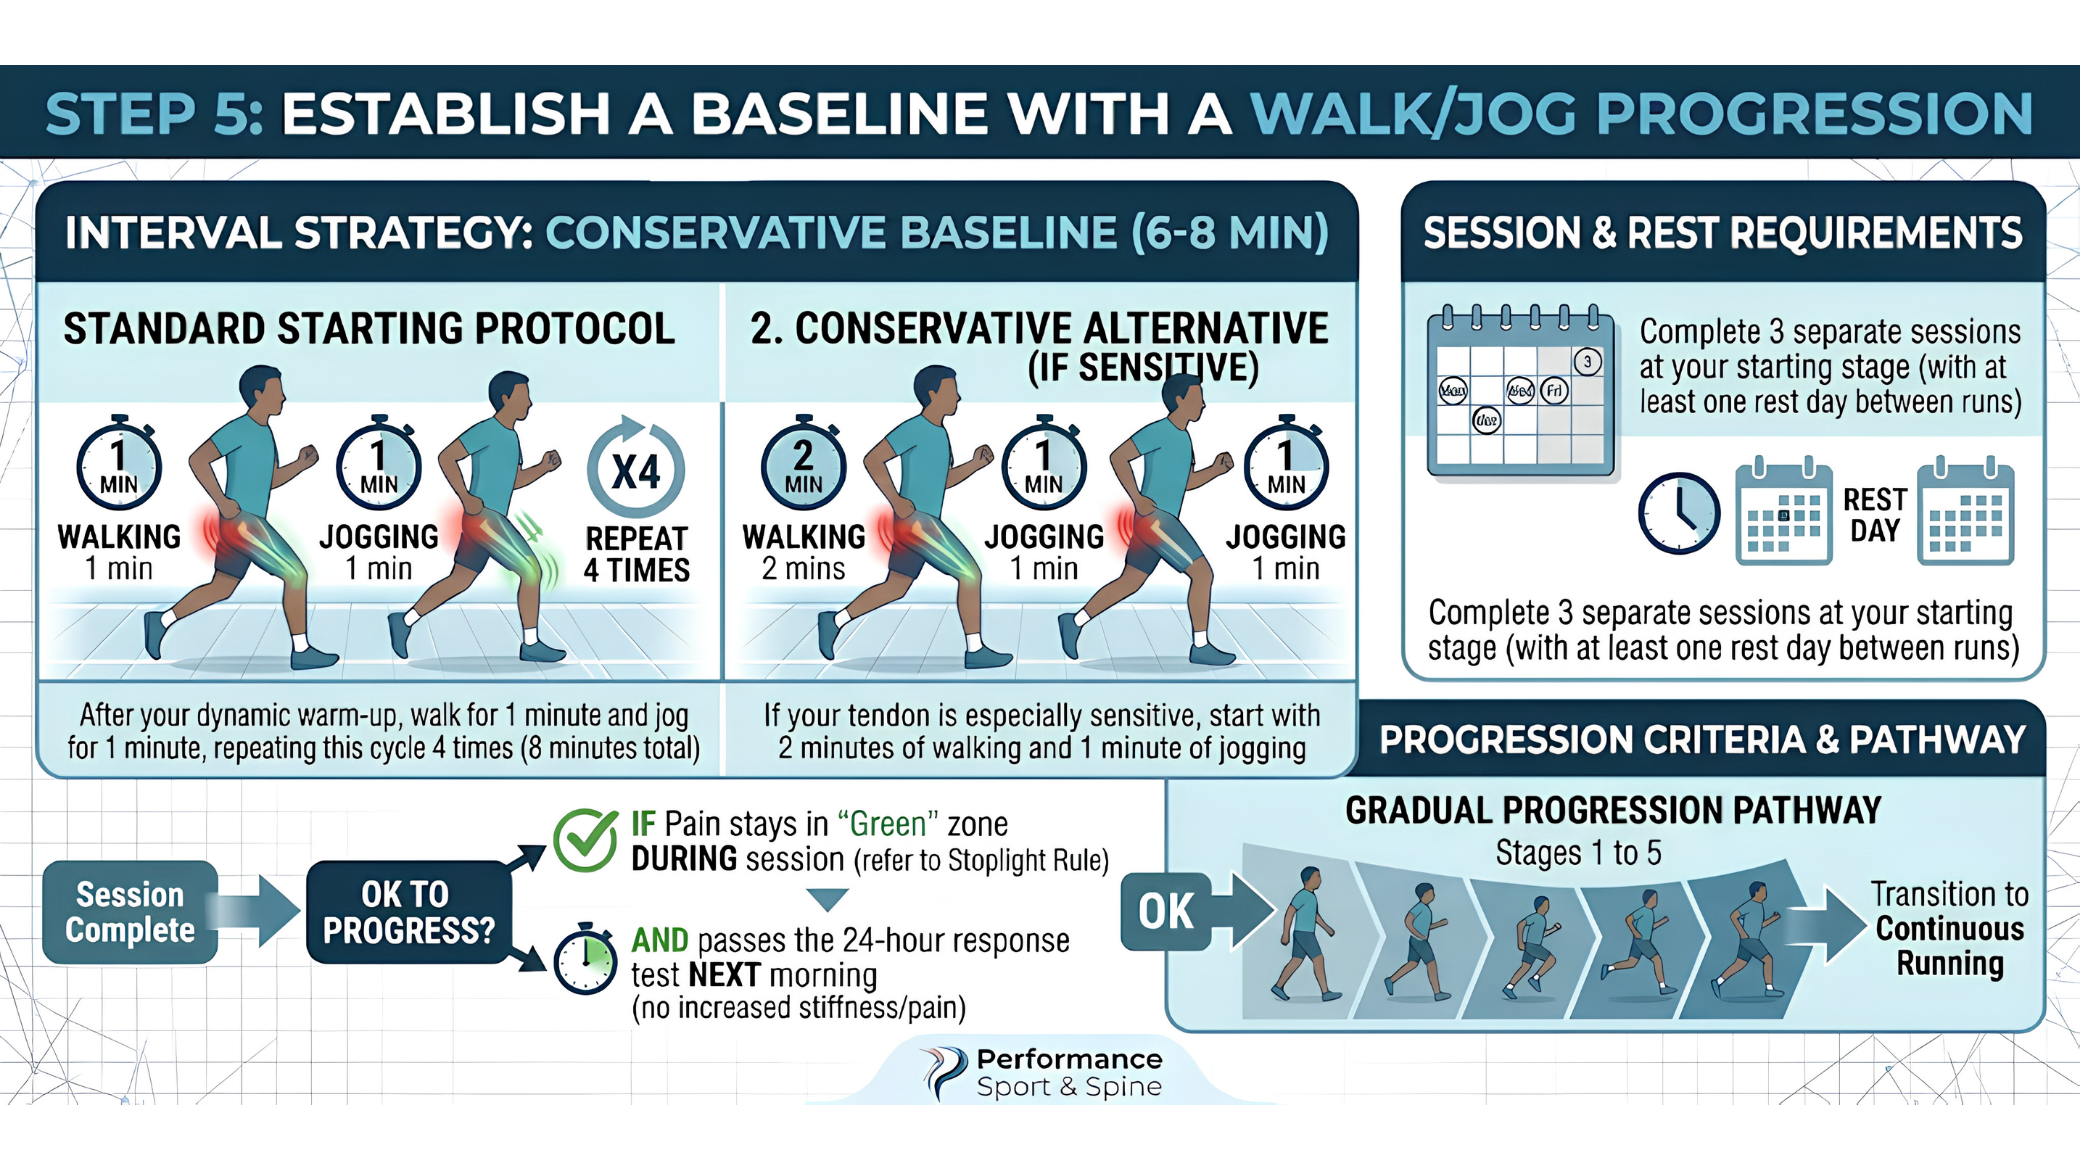
 Step 5: Establish a Baseline with a Walk/Jog Progression
Rather than heading out for a continuous run, start with a conservative 6-to-8-minute baseline using a structured walk/jog interval strategy:
-
Standard Starting Protocol: After your dynamic warm-up, walk for 1 minute and jog for 1 minute, repeating this cycle 4 times (8 minutes total).
-
Conservative Alternative: If your tendon is especially sensitive, start with 2 minutes of walking and 1 minute of jogging.
Complete 3 separate sessions at your starting stage (with at least one rest day between runs). If your pain stays in the “Green” zone during the session and passes the 24-hour response test the next morning, gradually progress your jogging intervals across 4 to 5 structured stages before transitioning to continuous running.
 Don’t Forget Daily Habits & Posture: Outside of your runs, eliminate daily postures that compress the lateral tendon—stop crossing your legs when sitting, avoid standing with your weight shifted onto one hip, and avoid sleeping directly on the affected side. For complete checklists on fixing daily positioning and calming flare-ups, read:
-
Stop Aggravating Your Gluteal Tendinopathy: 5 Daily Positions to Modify
-
Stop Irritating Your Hip: Sleeping & Pain Relief Tips for Gluteal Tendinopathy
Further Reading & Related Resources
Want to dive deeper into fixing outer hip pain? Explore our complete clinical library on gluteal tendinopathy:
-
Best Exercises: The Best Exercises for Gluteal Tendinopathy (Progression From Easy to Advanced)
-
Safe Stretches & Mobility: 4 Gentle Hip Mobility Exercises for Hip Pain & Gluteal Tendinopathy (and 5 Stretches to Stop Doing)
-
Why Clamshells Fail: Why Clamshell Exercises May Be Making Your Hip Pain Worse (And What to Do Instead)
-
Walking Modifications: 5 Walking Mistakes That Aggravate Gluteal Tendinopathy
-
Posture Modifications: Stop Aggravating Your Gluteal Tendinopathy: 5 Daily Positions to Modify
-
4 Critical Tips to Reduce Pain: Sleeping Modifications & 4 Critical Tips to Reduce Lateral Hip Pain (plus Why Your “Hip Bursitis” Isn’t Healing)
Ready to Eliminate Hip Pain for Good?
Tendon rehab doesn’t respond to shortcuts, passive rest, or endless stretching—it requires the right progression at the right time.
-
Self-Guided 12-Week Gluteal Tendinopathy Program: Want a complete, step-by-step roadmap? For roughly the cost of two insurance co-pays, our digital rehab protocol gives you the exact Level 1 through Level 4 progressive strengthening exercises, return-to-running templates, pain-monitoring guides, and daily posture fixes you need to recover fully. Explore the Gluteal Tendinopathy Rehab Program
-
1-on-1 Sports Chiropractic & Rehab in Redmond & Seattle: Local to the Eastside or greater Seattle area and want a personalized gait analysis and hands-on treatment plan? Schedule an evaluation at Performance Sport & Spine (
16770 NE 79th Street, Suite 100, Redmond, WA 98052) via perfsportnspine.com.
About the Author
Dr. Zach Greenwade, DC, MS is a licensed sports chiropractor with 13 years of clinical experience and holds a Master of Science in Sports Medicine. He is the owner and clinic director of Performance Sport & Spine in Redmond, Washington, where he specializes in evidence-based musculoskeletal rehabilitation, soft-tissue therapy, and active movement retraining for runners, lifters, and active adults across the greater Seattle and Eastside communities.
Medical Disclaimer
The information provided in this article and the accompanying video is for educational and informational purposes only and is not intended as a substitute for professional medical advice, diagnosis, or treatment. Always seek the advice of your physician, sports chiropractor, physical therapist, or other qualified healthcare provider with any questions you may have regarding a medical condition or before beginning a new exercise or running program. Never disregard professional medical advice or delay in seeking it because of something you have read or watched here.


